Explore the foundational ideas, history, and concepts behind web development. From defining HTML to understanding imposter syndrome — thoughtful takes and web theory live here
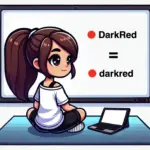
Gray VS grey? Is there a right choice between these two? It is well known that both gray and grey in CSS are considered equivalent with no impact on functionality. We can use either of them without any issues. In the context of web development and CSS, they are both recognized and accepted. CSS specifications and web browsers accommodate both equally.
Why 🤔 do web designers and programmers use both gray and grey in CSS?
Because they wanted to add a little color to the spelling debate!
Below we can see an example of two elements. We set gray for the first element while the second element has grey:
/* Using "gray" (American English) */.first-element {color: gray;}/* Using "grey" (British English) */.second-element {color: grey;}
CSS
Both examples are correct, and your CSS should be functional, .first-element and .second-element classes will share the same color, as CSS treats gray and grey interchangeably.
It turns out that the choice between gray and grey in CSS is primarily a matter of personal preference and doesn’t affect how web browsers interpret your code. You are free to use either.
Similarly, there are other color names with variations in spelling that are recognized by most modern browsers, for example, “lightgray” and “lightgrey” or “darkgray” and “darkgrey” are all valid. 😃
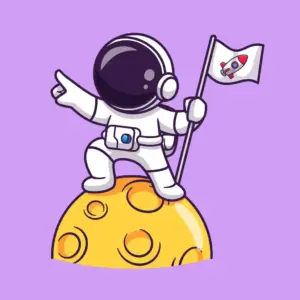
Imagine an astronaut floating in space, laptop in hand, surrounded by twinkling ✨ stars. It’s a scene that mirrors the adventure of programming—exploring the unknown, solving 🧩 puzzles, and pushing boundaries. Just as astronauts 👨🚀 👩🚀 embark on missions into space, programmers journey into the digital 💻 frontier.
With the rise of remote work, programmers have the freedom to code from anywhere on 🏖 🏰 🏕 earth. Remote work opens doors to global collaboration, while continuous learning keeps them ahead in a rapidly evolving landscape. So, whether you’re reaching for the stars or diving into code, remember that programming is a journey of discovery and innovation.
Are you considering a career in the world of programming? It’s a wild but also exciting ride, with twists, turns, and plenty of code to go around. But why do people choose this path, you ask? Let me break it down for you, along with some pros and cons to consider. 🤔 In other words, food for thought.
Pros: Why Programming Might Be the Perfect Career for You
Programming is an incredible profession that offers a wide range of opportunities. It allows you to create, innovate, and solve problems in ways that can have a significant impact on the world. Additionally, it offers attractive salaries and the flexibility of remote work. Furthermore, what a great satisfaction it is to bring ideas to life through code.
Plenty of 🎉🎉 Opportunities
To start, programmers have a plethora of job opportunities in a world that provides us with low budget prospects. Skilled coders are in high demand, from big tech companies to small startups. If you’re looking for a career with many options and a really good salary, programming might be your jam.
Believe it or not, coding isn’t just about numbers and logic – it’s an art form, too. Whether you’re crafting a well-designed app or solving a tricky bug, there’s a ton of room for creativity in programming. So, if you’re the type who loves to create and furthermore experiment, you’ll feel right behind your keyboard.
Problem-Solving 🧨 Superpowers
Ever feel like you’re the master of puzzles? If you love cracking enigmas, programming is your playground. Whether you are dealing with messy code or making a slow algorithm faster, programming is all about finding solutions. And trust me, there’s nothing quite like the satisfaction of overcoming a challenge and seeing your code in action.
Forget about getting bored. The field is constantly evolving whether it’s new languages, frameworks, or technologies. It’s like embarking on a never-ending journey of learning. If you thrive on exploration and discovery, programming will definitely keep you engaged.
Remote 🛵 Work
The beauty of remote work! With programming skills in your toolkit, you’re not tied to any particular location. Whether you’re coding from your cozy home office or enjoying a latte at your favorite café, your workspace is everywhere as long as you’ve got an internet connection.
If you are dreaming of hooking 🪝 high-paying opportunities such as freelance projects, contract work, or even full-time positions, improving your English skills can open doors to remote positions in countries offering generous salaries. 🤑 So, now it’s the right time to freshen them up.
Cons: Challenges You Might Face in a Programming Career
Programming comes with its challenges. It demands continuous learning and dedication, which can sometimes be truly stressful. Long hours at the computer can lead to health issues, and the solitary nature of the work can be isolating. Balancing these demands is crucial if you desire to maintain your position in this sector.
Learning Curve 📈 Alert
Programming may be challenging at first. Learning all those languages, algorithms, and frameworks can feel like trying to solve a Rubik’s cube blindfolded. Keep patience and stick with it. Before you know it, you’ll be coding 👩💻 like a pro. So, keep going!
Undoubtedly, the curse of every programmer’s existence – bugs. Those pesky little gremlins that sneak into your code and fill you with exhaustion and devastation. Tracking them down can be a real headache! But hey, don’t give up! Every bug you squash is a victory in your hands, and at the end of the day, it feels soo goood!! 🥇🏆
Maintenance 🤯 Madness
Creating software is only the start. Once it’s out there, you’ve got to keep it running according to plan. That means updating it, fixing security issues, and improving it again and again—all while handling your other tasks. It’s like juggling 🤹♀️ but with computer stuff. It’s not easy, but keeping your code running smoothly is one of the most crucial things to do. Believe me, you can do it, and you will!
Maintaining a healthy work-life balance can be a real challenge in a world where we’re all glued to screens. It’s easy to get sucked into the endless abyss of code. Separate work life from home life it’s crucial. Don’t forget to take breaks, get fresh air, exercise, start a new hobby, travel, go back in time when reading books 📖 was a must, or spend time with loved ones. After all, life’s too short to spend it all behind a screen.
Isolation 😑 Factor
While programming offers the freedom to work remotely and independently, it can also lead to isolation. Spending long hours in front of a computer screen and troubleshooting code solo can sometimes lead to loneliness. Without the colleagues of a traditional office environment, programmers may miss out on all the social interactions and spontaneous collaborations that can spark creativity and association. However, this isolation can be a welcome aspect of the job for people who blossom in solitary environments, allowing them to focus deeply on their work without distractions. Ultimately, whether isolation in programming is seen as good or bad depends on individual preferences and working styles. Some may find comfort in solitude, while others may desire more social interaction.
It’s completely up to you where to place it, on the pros or cons list. In the end, it’s a reflection of your character. ☔ 🌈 🌞
Huh, this awful self-doubt phenomenon. Impostor syndrome or impostorism is common among programmers, where skilled developers feel inadequate and fear being revealed as frauds despite their abilities. This lack of self-confidence can prevent their professional growth by discouraging them from participating in projects, speaking at conferences, or applying for advanced roles. Always remember that you won’t know if you can do it unless you try. So, do not hesitate! Take the shot! 🥁
Last but not least – burnout. Arising from long stress and imbalance between work and personal life. Symptoms include exhaustion and reduced productivity, which can lead to physical health issues and mental health problems like depression. We can prevent this by setting boundaries, organizing workloads, discussing it with our colleagues, asking for support, and taking breaks. Loong ☕ loong 💤 breaks! These techniques will help to maintain health and sustain enthusiasm for coding. Are all part of the journey. So, roll up your sleeves and dive into work. But always remember that burnout is not an option. Get out of your computer when you need a break!!
So, go ahead! Begin this programming journey and picture yourself as our courageous astronaut exploring new boundaries. Equipped with the tools of the trade—a laptop, determination, and a thirst for discovery. Whether you’re dreaming of distant 🌌 galaxies or lines of 📜 code, remember: this path is one of endless possibilities. So, what are you waiting for? Embark on your own adventure. Conquer the skies of coding! Bon voyage! 🪐 ✨
Attention everyone! 😃 In this post, we will learn about the !important CSS property, which overrides other rules to give a property the highest level of specificity. We use it selectively when we want to override stylings. We utilize it as a LAST RESORT only when we find ourselves in a situation where no alternative method can achieve the desired results.
Below, I’ve presented an outline designed to assist you in precisely placing 📌 our CSS property. It is typically applied to individual CSS properties within a style rule, not to the entire rule itself. Notice that the !important always follows the property value and always comes before the question mark.
I tried to make things clearer for you by preparing the example that follows:
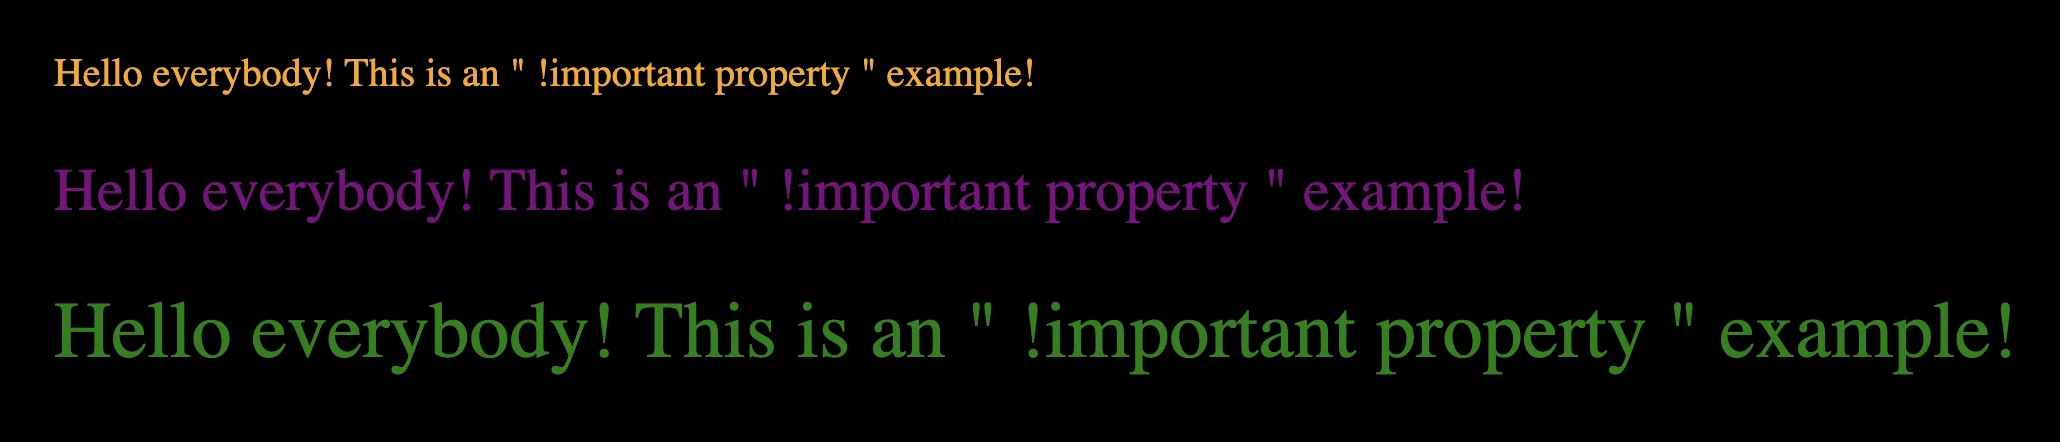
<divid="hello">Hello everybody! This is an " !important property " example!</div><divclass="hi">Hello everybody! This is an " !important property " example!</div><div>Hello everybody! This is an " !important property " example!</div>
HTML
Now, we can continue with our CSS code snippet. The code specifies different styles for the HTML elements based on their identifiers, their classes, and their names.
Elements with the id hello will have a smaller font size and be colored orange 🟧
Elements with the class hi will have a slightly larger font size and be colored purple 🟪
All div elements will have the largest font size and be colored green 🟩
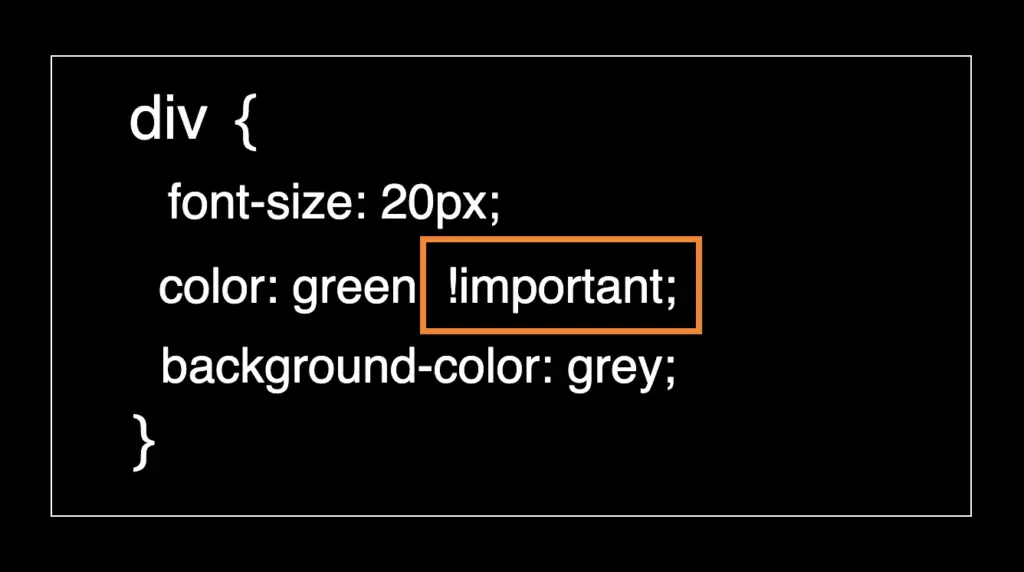
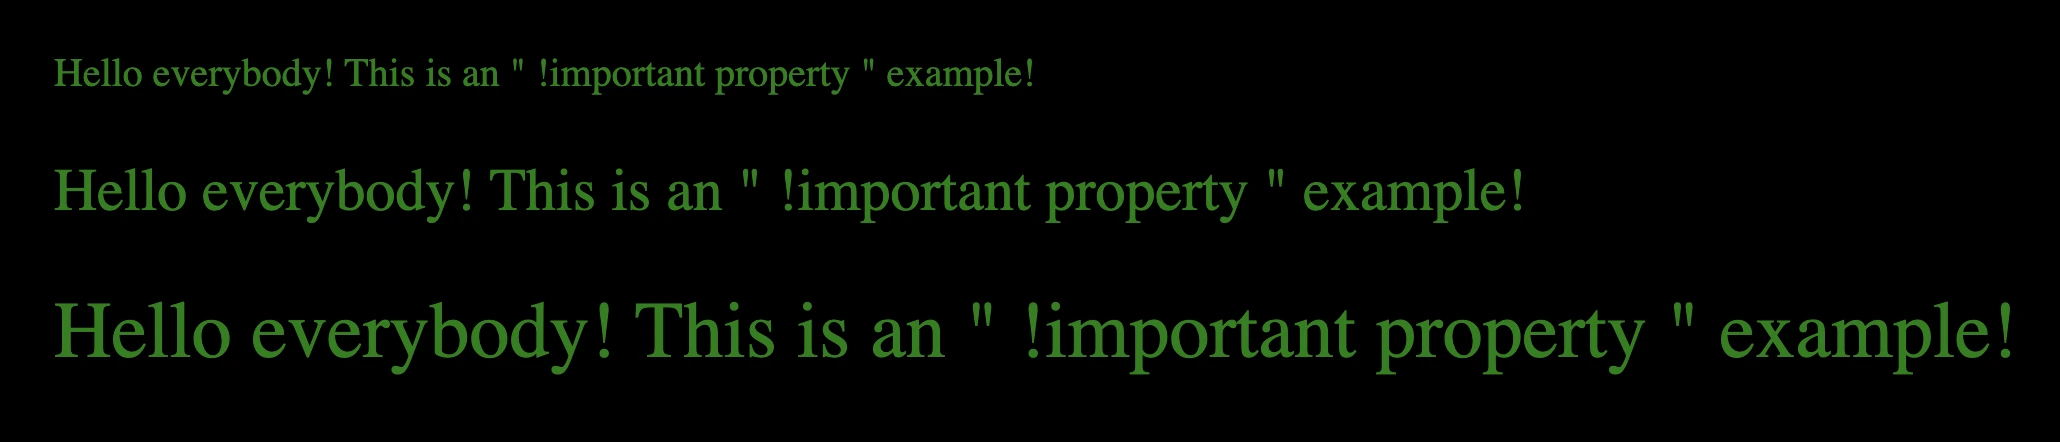
The image below captures the current screen rendering, reflecting the output generated by the previous code.
Now, let’s proceed and witness our property in action 🥁. As I previously explained, HTML elements are styled uniquely, guided by their attributes and the corresponding CSS rules. The id and class attributes play a crucial role in defining which styles are assigned to individual elements. Additionally, the careful use of the !important ensures that certain styles take priority.
div {font-size: 40px;color: green!important;}
CSS
In the provided image, it’s obvious that the font-size of our HTML elements remain consistent, while the text color switches to green 🟩. We can see clearly that this color change takes precedence over other specified colors, thanks to the application of the !important CSS property. 😃
Best Practices: Avoid Using the !important CSS Property
Understanding the ✨ usage of the !important CSS property is crucial but it should only be employed when absolutely necessary. Here are several reasons to steer clear of it:
Specificity Conflicts: The !important declaration makes a CSS rule very strong 💪, so it’s hard to change it with other styles. This might cause surprising 💣 problems when we try to edit our styles later.
Maintainability Overheads: If we use it too often, our styles can become a confusing 🍝 mix of conflicting instructions. Over time, as your project grows, the number of !important can increase significantly, making it extremely challenging to maintain and extend our CSS.
Debugging Complexity: When we’re trying to fix problems in our CSS, it gets trickier 🤹♀️ 🤹♂️ if we’re using !important. We might end up spending more time trying to figure out issues and less time making our styles better. Over time, it becomes difficult to determine why a style was applied, and making changes or debugging becomes more complex.
Override Difficulty: If we want to change a rule that uses !important later on, we’ll have to make another rule 💥 with even more strength using !important. This can create a loop 🌪 that becomes hard to control.
Code Readability and Understandability: Overuse !important can make your CSS code harder to read 👀 and can create a challenge for other developers trying to understand 🤯 it.
Future Compatibility: Relying on !important to fix styling issues might not work well in the long 🏃♀️ 🏃♂️ run. It’s better to understand and use CSS specificity and inheritance properly to build styles that are adaptable and easy to maintain.
While there are situations where !important can be really useful, such as dealing with third-party CSS or when working with dynamically generated styles, it’s generally best to use it rarely and as a last resort. It’s usually better to write well-structured 🏗, specific 🎯, and organized 🧩 CSS rules to avoid the problems associated with !important.
When I got my first job as a web developer, I was over the moon! Part of my everyday work was to join various meetings. In many of them, I heard unfamiliar terms about scrum repeatedly without recognizing them. Inevitably, this sparked my curiosity, leading me to research what is scrum and its associated jargon.
Don’t get me wrong, I could, of course, ask, I could, and I did, when I didn’t feel shy to do so (yeah, I am that kind of person… 🤷♂).
After learning these terms, though, I wanted to share them with you. They might help you by preparing you for interviews, for your first meetings, or if you are feeling a bit shy (though you really shouldn’t be). After all, as one of my professors used to say:
There’s no such thing as a stupid question! Only stupid answers!
Heads up! This post is meant to be a simplistic approach to Scrum, think about it as a friendly and practical introduction to some of Scrum’s concepts. My basic goal here is to help you become more prepared by having all the information you need when working with these concepts.
Ok, you’ve been warned, let’s start our exploration…
Scrum terminology
Scrum is a framework, a set of “rules” and tools, used for managing projects. It has nothing to do with the way you write code and implement features. Companies use it for managing software development phases but it may also apply to other types of projects.
Scrum has a set of meetings, principles, and tools that were created to help teams achieve their goals faster and more efficiently.
Let’s check some terminology about Scrum’s tools: (I dislike terminologies too! It’s just that we need to define a few words so that we can both be on the same page…)
Sprint
A sprint is a pre-determined period of 2–4 weeks (duration is agreed upon by the team), during which the team decides to achieve specific objectives. In a team of developers, these objectives would consist of implementing some features.
Backlog
A list of tasks and features that the team needs to evaluate, prioritize, and add in a sprint. You could think about it as a to-do list.
Roadmap
A roadmap is a plan that includes all high-level goals and milestones for a product. Picture it as a combination of the desired features the team intends to implement along with a carefully crafted timeline. By looking at a roadmap, one should have a clear overview of the path that was defined by the product team regarding the product’s vision.
Daily Scrum (a.k.a Standup)
A meeting that is held on a daily basis, in which each developer answers the following questions:
What did you do yesterday?
What will you be working on today?
Is there anything blocking your work?
Why is it called a standup? Usually, when this meeting takes place, the team creates a circle in which every member is standing. The reason behind standing up is to finish quickly your daily report and not spend more time than needed.
Now that we know a bit more about Scrum let’s see what is a Sprint planning meeting and how we play Scrum poker.
Sprint planning
Before the start of a sprint, the development team and members of the product team will hold a meeting called the Sprint Planning meeting or simply Planning.
The goal of this meeting is to decide, usually based on priorities, which features will be implemented by the team in the upcoming sprint.
Photo by Austin Distel on Unsplash
Although guidelines on what you would discuss during such meetings vary from team to team, some common discussion topics are:
Which tasks from the backlog should you, as a team, implement in the new sprint?
Define the team’s capacity. By capacity, we mean how much work each team member can achieve during the next sprint
Review any new feature specifications and acceptance criteria
Define potential bottlenecks
Assign tasks/features to a developer based on their capacity
Each planning is unique and may vary from team to team. So take what I describe here with a grain of salt.
Acceptance criteria is a list of characteristics a feature should have to be considered successfully implemented.
Bottleneck is a term used when we refer to an issue that is blocking other processes.
Scrum poker
During your sprint planning, and before the product manager decides to finalize it by starting the new sprint, you could hear your team members asking for poker time!
Casino Royale
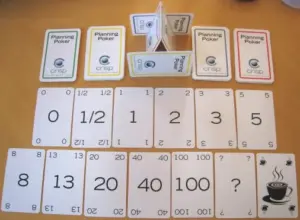
Yeah not that kind of poker, although a good poker face is always an asset! To play Scrum poker, first of all, you will need a special deck of cards, one example is seen in the image below:
Source: Wikipedia — Planning poker
Each card has a score, which represents the difficulty of the implementation of a feature. The larger the number, the greater the difficulty.
Playing poker isn’t hard at all… Scrum poker I mean. How is it played you ask? Let’s have a quick glimpse:
Preparation
Every team member gets their own cards or uses scrum poker mobile apps, instead of cards, if they fancy electronic cards. They all sit together or open cameras if the team is remote.
Playing poker
One member of your team selects a feature from the ones you have decided to add in the new sprint.
Every member evaluates the feature by deciding on its implementation difficulty and selecting the respective card. This process is done without members sharing their thoughts or showing the card to each other. Not yet at least.
One member (usually from inside the team) starts a countdown, of a few seconds.
When the countdown ends all members show each other the scoring card they‘ve selected, for the sprint item, under evaluation.
If all scores are the same (yeap it can happen) this score gets assigned to the sprint item. If there are significant differences between cards, then, whoever has a card that deviates from the team’s average shares their thoughts on the reason for their selection.
E.g if the average amount of cards shown is 13 and one member has selected a card with the number 40, it would be nice to explain the reason. This way the team might find out if something got ignored by mistake about the item’s implementation, from the other members of the team. If the team still feels they need to stay at 13 then the score is assigned to the card, otherwise, they change it to a new one.
Since the evaluation of the feature has finished, The next sprint item is selected and the loop starts again. This process is repeated until all sprint items have poker scores.
Why do we play poker?
Ok, we played poker, but why? What does this score represent for each card? This score is just a difficulty level, it means something is more difficult compared to something else. It has nothing to do with how many hours, or days it will take for a feature to be deployed.
But why do we care to score, based on how difficult something is?
Let’s say you have a team that has worked for 10 sprints, and in each sprint, the team has developed, features of, on average, 65 points. By knowing this, a product manager will be able to identify how much their team can deliver and how fast that could happen.
Now, wait a minute there… I used the “how much” word, right? And we said that score has nothing to do with time… Well yeah, but in the end, it’s a metric, which will inevitably get used by the product team when a roadmap is created. It will be used to answer how soon some features may be deployed and when some goals from the product team could be reached.
I believe now you are ready to play some poker when requested by your team! Just don’t forget your hat and sunglasses! 🤭
Hint If you have just been onboarded on your team, it may be not easy to evaluate a feature, since you may know nothing about the codebase… It makes sense, and your team knows that, so don’t feel bad about it, give it your best guess and you’ll be just fine!
Retros
So your sprint has finished, you gave it your best and now it’s time for confession, the retro meeting!
The first time I got in a retro meeting, my manager, told me “Would you like to start?” and I was like… “Sure… what should I say?” 😇
Retros, or Sprint retrospectives, are the best meetings of the Scrum framework! At least from my point of view. A retro meeting is set at the end of a sprint and is a powerful tool that teams use to get information about the issues they faced during the sprint.
During the retro, each team member reflects on what was good or bad during their sprint. As a guideline, usually, some of the questions you would see getting answered would be:
What went well during the sprint?
Was something problematic?
What could be improved in the next sprint?
What can the team do to better support each other?
How can the team improve its performance?
I like it because it’s a great opportunity to share your thoughts/feelings and by doing so, bond with your team. It might feel difficult to do so at your first gatherings, but after a while, you’ll love it! I’m sure!
It’s group therapy if you think about it 😇 and a great way to finish your sprint/week! Believe me, if you learn how to master this meeting, you will be able to help your team and also improve your workflow! Don’t be shy, you got this!
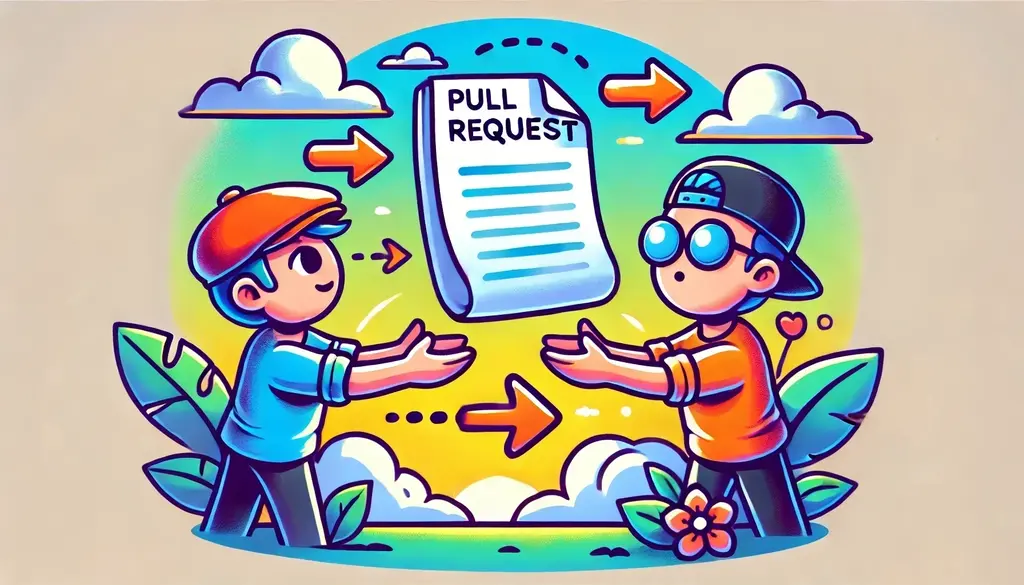
There will be times when you will be working on huge features (if you haven’t already 😎), some of which could take weeks and some even months. During your implementation, you will have to find a way to create better pull requests and try to write kickass code, all while figuring out how to make the review process better. After all, better reviews mean fewer bugs, right?
In our previous post, we discussed some ideas for improving pull requestsafter a pull request has been created. However, sometimes, improving a pull request may require actions to be taken before our initial commit.
So how can one create a better pull request before even committing their changes? The answer lies in carefully planning the steps of implementation before starting the actual implementation process. Whaaat? 🫨
Let’s decide on an example or a use case so that we can discuss our theory on common ground.
A full-stack feature use case
(This is a use case with simplified specs, used only as an example for this post, to ensure that we are both on the same page when discussing the topic at hand)
To illustrate, let’s suppose we were asked to implement a new full-stack feature. In our example, we’ll assume that we want to add a new comments section to our blog.
After having a design session with our team, the following specs were requested:
Use case – Feature specs
specs, short for specifications, outline the requirements a new feature implementation must meet to pass QA testing and be deployed.
In the existing post section, a new comments section will be added where readers can view and add comments related to the post.
Both the writer and the admin will be able to add, edit, and delete any type of comment.
A reader will also have the ability to add/edit/delete their own comments.
Show statistics for each post’s comments.
Prerequisite changes
It’s considered good practice to always take a step back and carefully consider the steps you should follow to implement a feature before diving headfirst. As the saying goes:
Measure twice Cut once!
But how does this relate to creating better pull requests?
Well, in my opinion, when thinking about a feature’s implementation, the potential outcomes typically fall into the following categories:
Ways to achieve the desired outcome
Challenging code areas that may need refactoring beforehand
Necessary changes that are not directly related to the feature
(This list is not that comprehensive! 😋)
Both the last two items on the list are related to prerequisite changes that need to be made before the feature is successfully implemented. Some examples of these changes could be:
Introducing a new package dependency that needs to be used by your feature
Introducing some reusable components
Perform some code cleanup before introducing new code
By identifying similar changes early on, you can significantly streamline your feature’s review process. Rather than creating one massive pull request that could make your colleagues’ lives challenging, you could create initial pull requests with independent changes, merge them, and continue with your feature implementation. In the follow
Identifying our use case prerequisite changes
While thinking about the feature’s implementation, I realized that it would be beneficial to introduce some distinct roles for our users, such as readers, writers, and admins. Additionally, since we have decided that we need statistics, I did some research and came across a fantastic statistics package to use for displaying how many comments a writer has over time.
Although both changes are connected to our feature implementation, it’s worth considering the extent of their interdependence. Could we introduce these two changes and deploy them without completing our feature? The answer is yes! But how?
These two changes, along with any necessary tests, could be included in different branches from which we would create pull requests and get them deployed.
One branch will introduce user roles, and the other will contain the installation and configuration of the statistics package.
These two branches can be referred to as prerequisite branches.
Both pull requests will likely (depending on the codebase and implementation) not affect our existing codebase and can be reviewed and merged independently. As a result, we can continue working on our feature, without having our work blocked, at least not initially.
Don’t get me wrong. Eventually, we will need our prerequisite changes. However, until that point, we will have found a way to continue our work and also start deploying pieces of code that do not impact our users or hinder our work.
Splitting commits
Now that we have reviewed and deployed our prerequisites, we need to focus on the actual feature. If you also like to work on full-stack features, you might find yourself following three paths while implementing a new change:
Starting from the backend.
Starting from the frontend.
Diving in both.
Defining the best approach depends on your developer profile and the work needed. Each approach has many advantages but I’ve seen that shifting between approaches from time to time can transform and improve your mindset as a developer. So choose wisely and have fun!
Meanwhile, if you decide to adopt the one-side-at-a-time approach then why not improve your pull request using the same method? How? By splitting your commits as you progress with your implementation.
Splitting commits, for example, by backend and frontend ones, may also help if you are working with a team that doesn’t have full-stack engineers but separate teams of front and back-oriented developers.
Splitting your work into smaller commits may also enhance your review process and lead to better pull requests. This is because individual commits also help reviewers concentrate on specific commit changes rather than the entire scope of your pull request.
Applying split commits to our example
To see that in action, let’s assume in our example that we will be following the implementation steps below:
Backend implementation
Implement the comments CRUD logic.
Introduce role handlers needed for checking who can see what.
Add any unit/integration tests.
Frontend implementation
Create our new UI views and any additional components.
Add the necessary routes.
Add any unit/integration tests.
By creating two separate pull requests or one pull request with different commits, each containing the respective changes (backend & frontend), we can greatly improve the efficiency and effectiveness of the review process.
I get it. Sometimes, this may seem like overkill, but trust me, breaking work into smaller pieces, will unlock new paths in your thinking process which will boost your problem-solving skills in multiple ways.
In general, developers often neglect managing pull requests as we tend to believe that our work ends when pushing that final commit. I can assure you, though, that giving more emphasis on the other aspects of your workflow, as we’ve talked about in this post, can have a significant impact on your work.
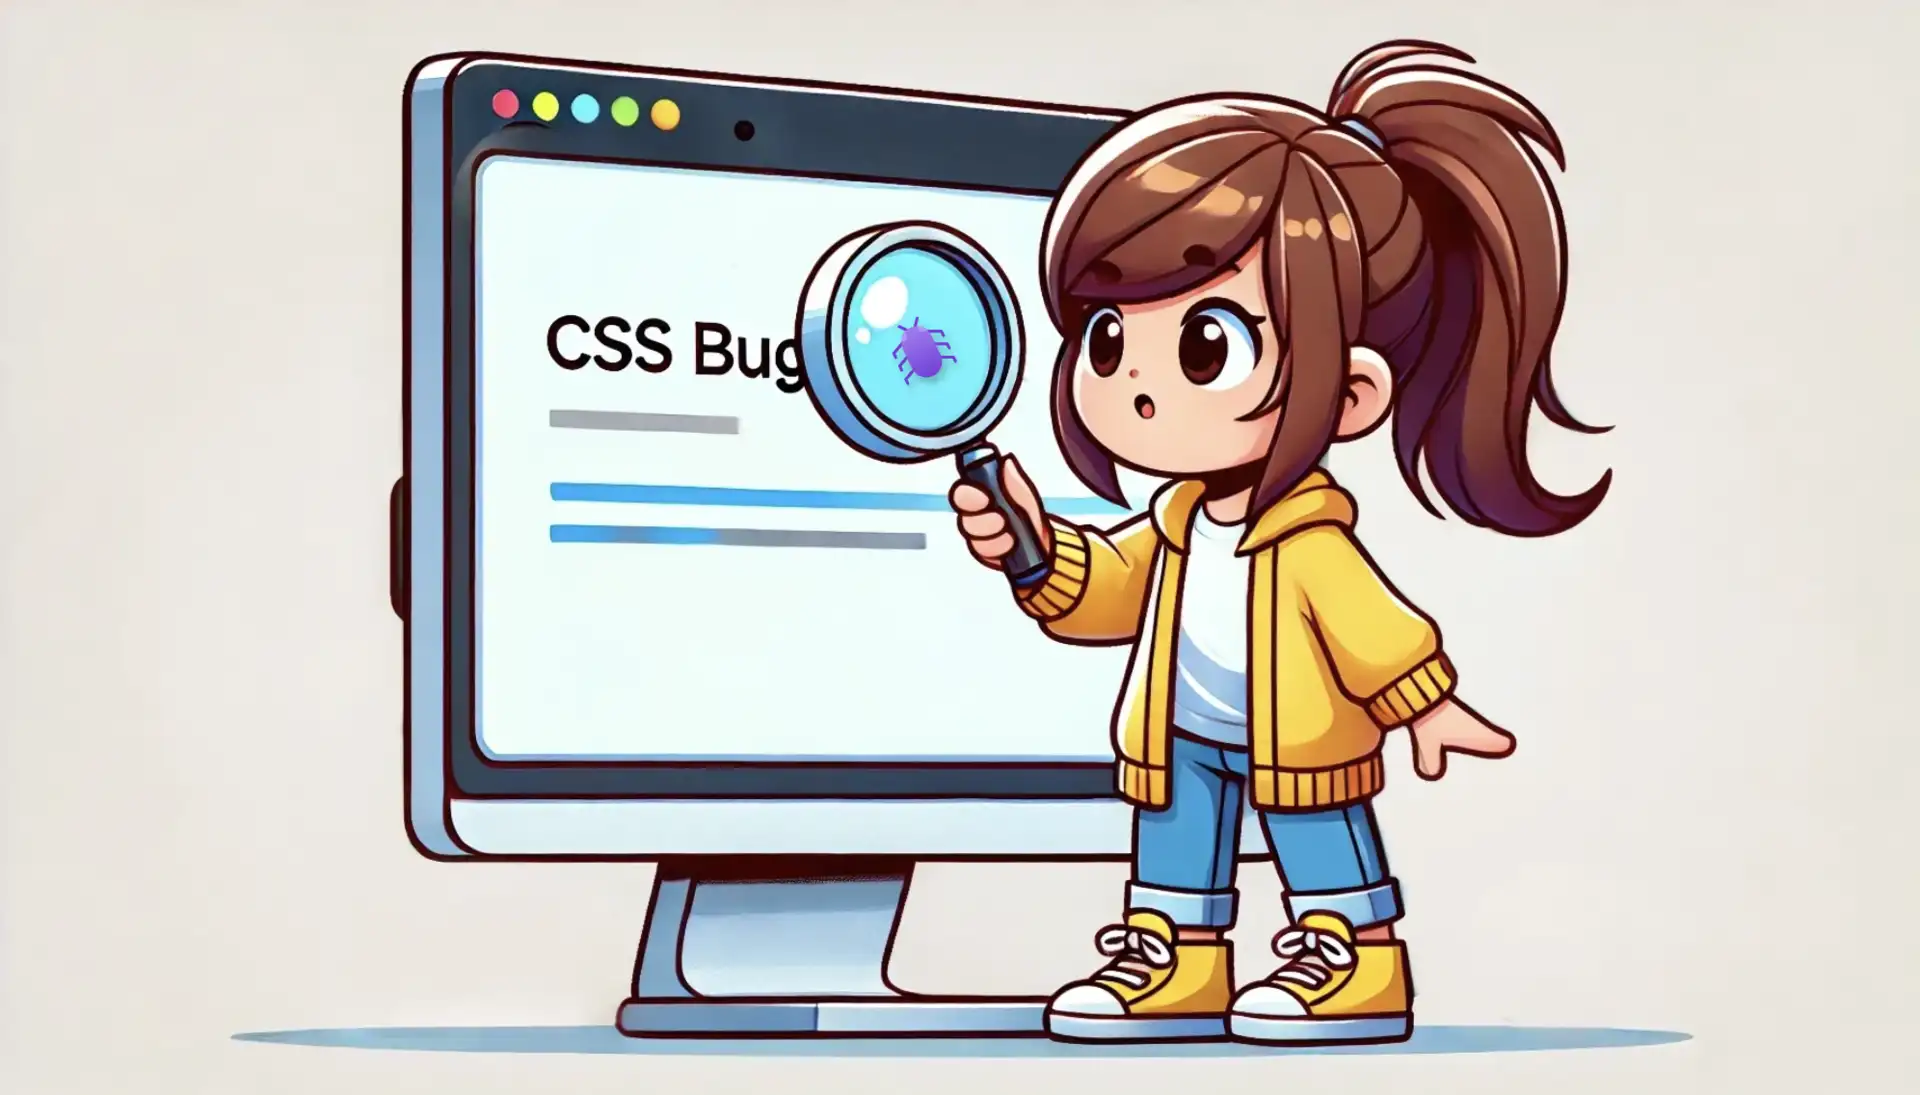
Hey there! Have you ever wondered how bugs became a thing in the computing universe? Let me spill the beans about the origin of the term bug in software development—it’s a hoot of a tale! 😄 So, picture this: Back in the day, computers were as big as a room and probably had more wires than a spaghetti bowl. Well, something hilariously unexpected happened. Here’s a brief history for you explaining why we often refer to issues in software as bugs.
First of all, let me introduce you to Grace Brewster Hopper. She was both an ultimate tech whiz 🪄 and a naval officer.
On September 9, 1947, her team was tinkering with the Harvard Mark II computer when BAM! You won’t believe what they found—it was a real-life moth(!) causing chaos inside the computer! It was trapped inside one of the computer’s relays as the cause of the malfunction.
The funny thing is that they didn’t just squash the poor moth and call it a day. Oh no! They decided to immortalize it, 📸 taping the moth in their logbook and crowning it as the “first-ever case of finding a bug” in a computer. 🦋📔 And voila! That’s how the term ‘bug’ started its digital journey, describing any wonky stuff in computer land.
It is quite interesting, how historical anecdotes like the “moth in the computer’s relays” have contributed to the terminology we use in the world of software and computing. From then on, the computer world couldn’t resist the charm of the word ‘bug’. It’s like the unexpected guest that never left! Whenever something goofy happens in software, hardware, or anything in between, we lovingly call it a ‘bug’.
Isn’t it just delightful how a tiny moth sparked a lingo revolution in the tech empire? The ‘bug’ tale is now part of our nerdy folklore, adding a sense of fun 😄 to the otherwise serious world of coding and fixing stuff.
Grace Brewster Hopper’s reaction to this little moth sparked a concept that echoed globally. So, let’s follow her lead and mimic her actions! We might repeat her success one day.
IF IT’S A GOOD IDEA, GO AHEAD AND DO IT. IT’S MUCH EASIER TO APOLOGIZE THAN IT IS TO GET PERMISSION