Learn the basics of HTML and how to build better web pages. Easy guides, tips, and examples to help you write clean, structured code and improve your web development skills.
If you’re here, chances are you’re looking for HTML for Blinking Text — maybe you remember the old-school <blink> tag that used to make text flash or flicker on screen. It looked something like this:
Modern browsers no longer support <blink> because it was never officially standardized, causing serious accessibility issues. Visually impaired users, in particular, often rely on assistive technologies that don’t handle blinking content well. Plus, from a design standpoint, constant blinking can be distracting and overwhelming to users.
Blinking Text Using HTML and CSS
So how do you create blinking text today, in a way that’s clean, compliant, and works across all devices? That’s where HTML and CSS come in. With simple CSS animations powered by @keyframes, you can replicate the blinking effect — only better.
<pclass="blinking">This text will blink using CSS</p>
This CSS-based method offers more flexibility than the old <blink> tag. You can control timing, opacity, color changes, or even trigger it on events like hover. Plus, it works across all modern browsers, making it a practical solution for attention-grabbing UI elements like warnings or notifications.
You can even combine it with other effects like scaling or background changes for more dynamic visuals. Whether you’re building a retro-style webpage or emphasizing urgent content, this is a reliable, modern solution.
If you’re working on a project and still want that eye-catching flicker using CSS animation is the best and most future-proof way to implement HTML for Blinking Text. It’s responsive, accessible, and keeps your design up to today’s standards.
Want to take it to the next level? Check out our post on creating a blinking eyes animation using CSS!
The <span> tag is a powerful yet often overlooked element in HTML. It’s commonly used for adding style and interactivity, but what does span do in HTML exactly? In this guide, we’ll explore its full potential and show you how to use it effectively on your web pages.
What is a span tag?
We use HTML <span> tag to target and manipulate specific 🍰 parts within an HTML 🎂 element without affecting the layout of surrounding elements. In simple terms, it acts as an inline container for styling small portions 🍰🍰 of text.
<span>....</span>
HTML
Why and when to use span in HTML?
Since <span> does not introduce additional structure or spacing, it is ideal for precise, targeted styling such as:
Highlighting text, changing colors, or formatting specific letters, words, or even a small paragraph.
Wrapping text for CSS animations or visual effects.
The difference between span and div
While both <div> and <span> are used for grouping and styling elements, they behave differently in terms of layout and structure. The table below highlights their key differences:
span
div
inline element
block element
stays within same line
starts new line and takes full width
does not affect layout
breaks the normal text flow
HTML span using inline styling
Below, I’ve prepared an example to illustrate how we use <span>, along with an image to help you visualize it better. 🤓 In this example, we use <span> to change the style of multiple parts of the text within a <p> element. The <span> tag wraps around specific words we want to highlight or style differently without affecting the entire line.
<p> My sandwich has <spanstyle="color:yellow">yellow</span> cheese,<spanstyle="color:red">red</span> tomatoes and<spanstyle="color:green">green</span> fresh lettuce!!</p>
HTML
Styling span in CSS: Best practices
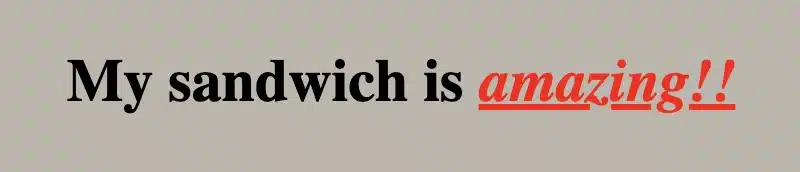
We can also style <span> elements beyond CSS inline styling. Below, I include an example and an image to picture it. In this example, we place the <span> element within a <div> element. The CSS code applies specific styling (color, font style, and text-decoration) only to the text inside the <span> tag, allowing us to highlight or change the look of a selected part without affecting the rest of the text.
<div> My sandwich is <span>amazing!!</span></div>
HTML
div > span {color: red;font-style: italic;text-decoration: underline;}
CSS
🔖 Here’s a trick: With div > span, we’re styling only <span> elements that are direct children of a <div>. This way, we target only this specific span, without affecting other <span> elements in the code! 🔴
Curious to learn more about how to focus on the exact elements you want? Look at my CSS selectors post — it’s all about precision! 🎯
Targeting letters one by one using span in CSS
Want to take it a step further? We can make it even more impressive by styling each letter of one word individually!! 🧨 ✨
<h1> My sandwich is <spanclass="letter-a">a</span><spanclass="letter-m">m</span><spanclass="letter-a">a</span><spanclass="letter-z">z</span><spanclass="letter-i">i</span><spanclass="letter-n">n</span><spanclass="letter-g">g</span><spanclass="exclamation-mark">!!</span></h1>
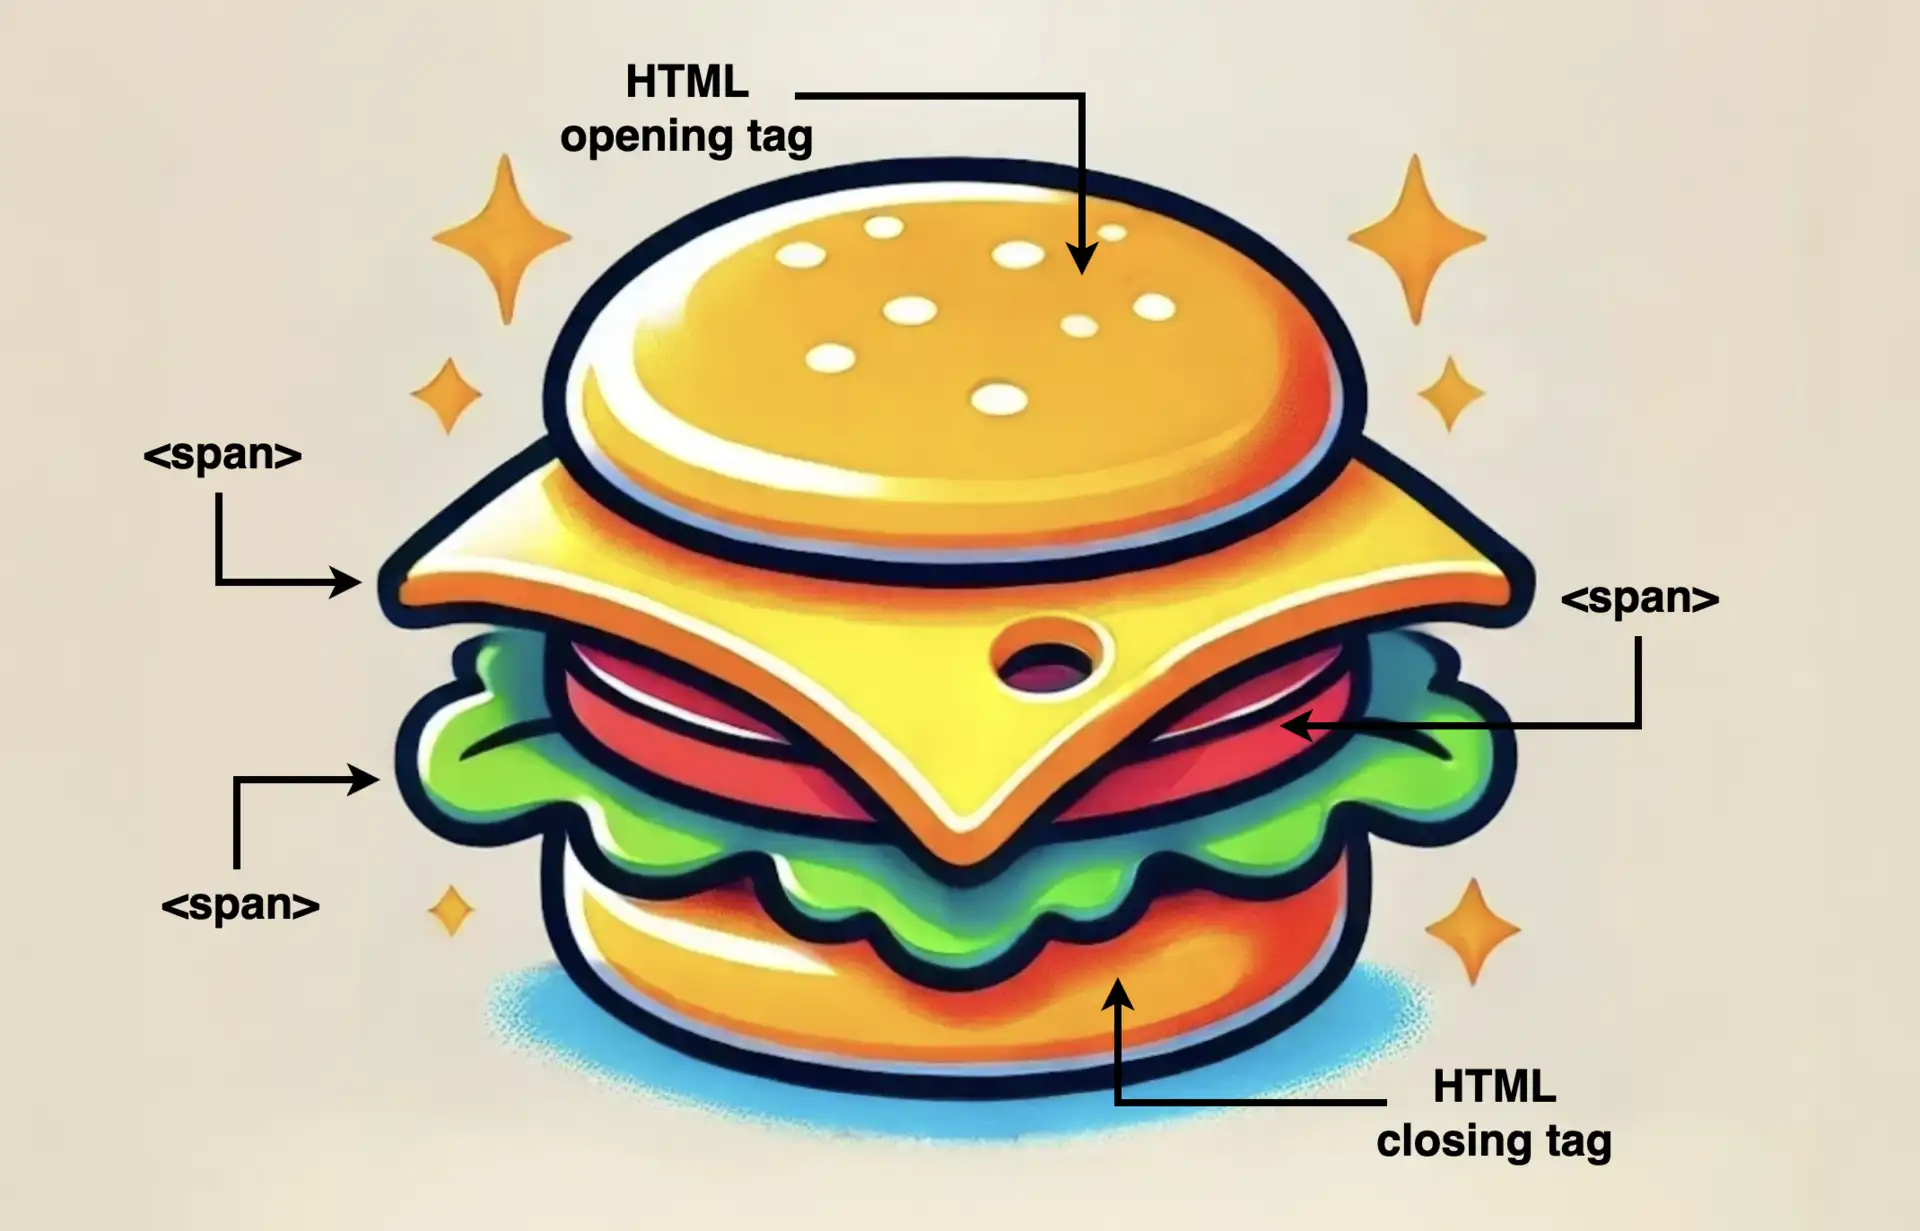
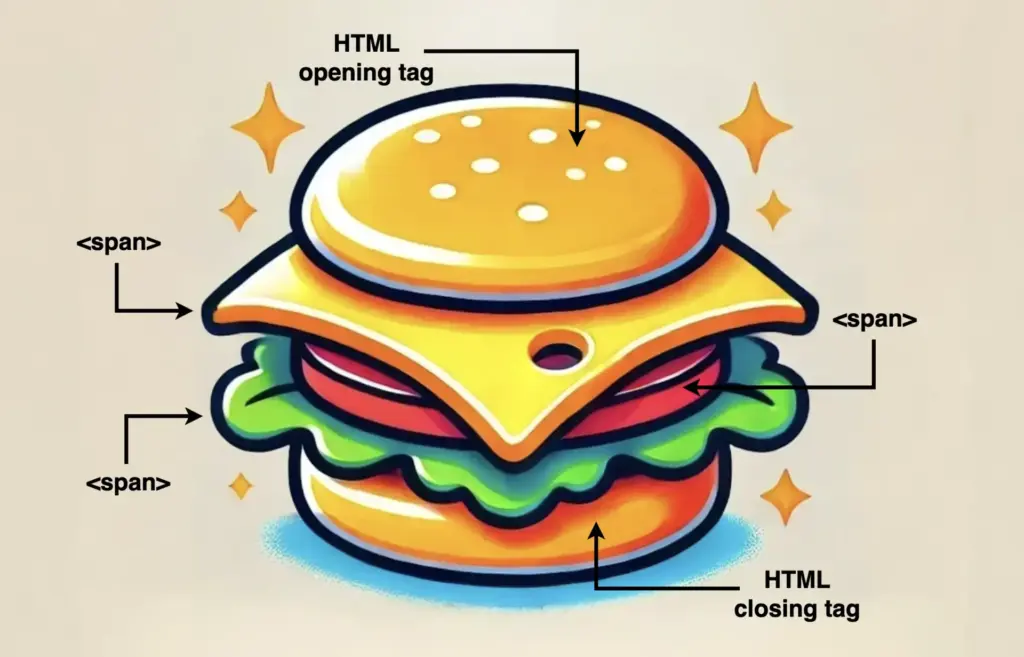
What about making our learning more fun and using the metaphor of a sandwich to represent how the <span> elements are surrounded by their container element (HTML opening and closing tags)!
Here’s the idea 💡
Sandwich with span as the filling 🍔
Imagine an illustration where a slice of text is styled like a sandwich with:
Bread Slices: Representing HTML tags surrounding the <span> element.
Fillings (cheese, tomato, lettuce): Representing the words or phrases wrapped in the <span> elements, styled differently to stand out, just like all these fillings inside a sandwich.
This metaphor will show the positioning of <span> clearly! 🥳
Understanding the role of a programming language is the key 🗝 to answering the question “Is HTML a programming language?”. 🧐
To put it simply, the answer is no, HTML is not a programming language.
HTML stands for HyperText Markup Language, a type of markup language used for creating structured content. But what does that even mean? Let’s break it down a bit.
Markup Language
A markup language is a system for creating structuredtext in a way that both humans and machines can read. It consists of tags or elements known as building blocks. These tags are responsible for the structure of the web page defining how its content is organized and formatted. Some examples of such elements would be <h1> for headers, <a> for links, <p> for paragraphs, <footer> for footers.
HyperText
The term “hypertext” is part of the name because it allows text to include links – called hyperlinks – to connect to other pages. Turning text into a hyperlink makes it easy to navigate between web pages.
By combining hypertext and markup, we get HTML, which is a language that structures web pages while also adding links to make them somewhat dynamic by connecting to other resources.
That’s pretty cool, but even though we have defined a “smart” language, the question still remains: Is HTML a programming language?
Getting to the answer: Is HTML a programming language?
We can undoubtedly say that a programming language gives precise instructions to a computer or other devices to perform specific tasks, process data and create interactivity. Programming languages can build everything from simple scripts to complex applications, empowering developers to create tools and software that automate and enhance systems.
While HTML structures and displays content, it lacks the ability to process logic or perform tasks like a true programming language.
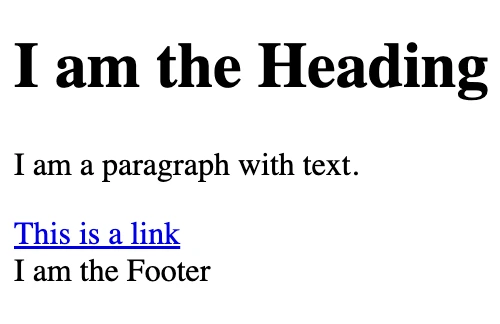
A quick glimpse at how HTML is written
Below, I’ve included a simple HTML code snippet with an image to illustrate how the HTML actually works. In this case, it only defines the structure of a heading, a paragraph, a link, and a footer. It doesn’t involve processing, which is the role of programming languages. 😉
<h1>I am the Heading</h1><p>I am a paragraph with text.</p><ahref="https://example.com">This is a link</a><footer>I am the Footer</footer>
HTML
To make websites dynamic or interactive, we have to combine HTML (for structure) with CSS (for styling) and Javascript (for functionality and behavior). The last one is an actual programming language. 😃 ✨
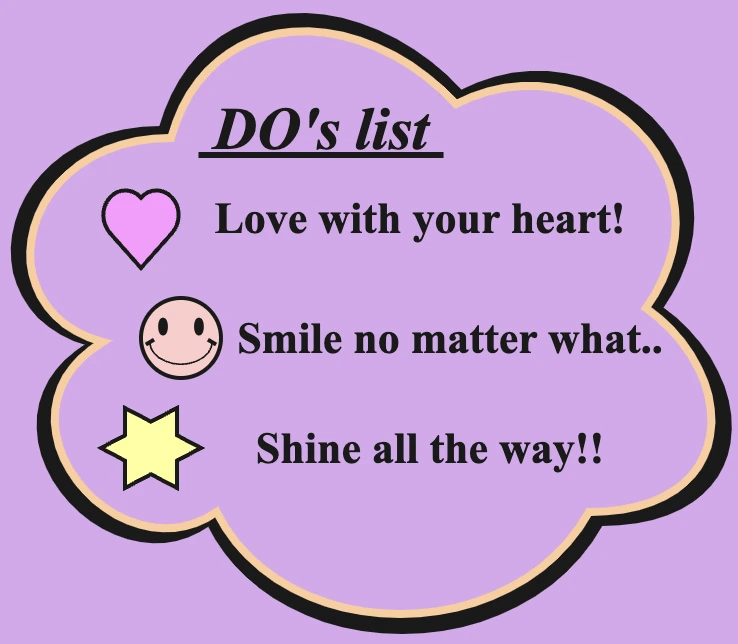
Is our life surrounded by lists ✔ or do we live in a perfect world where taking care of things is unnecessary? Are we able to deal with our problems without organizing them? Are we ready to work on something difficult or, even worse, build something from scratch without using a list of steps? Do lists improve our life balance and make us more methodical? In this post, we will see how to create HTML lists and make our work and, by extension, our lives easier. 😃 ✨
Do lists improve our life balance and make us more methodical?
HTML Lists
A list is defined as agroup of matching items. By default, the list’s direction is vertical. There are three categories of HTML lists: ordered, unordered, and description lists.
Ordered list
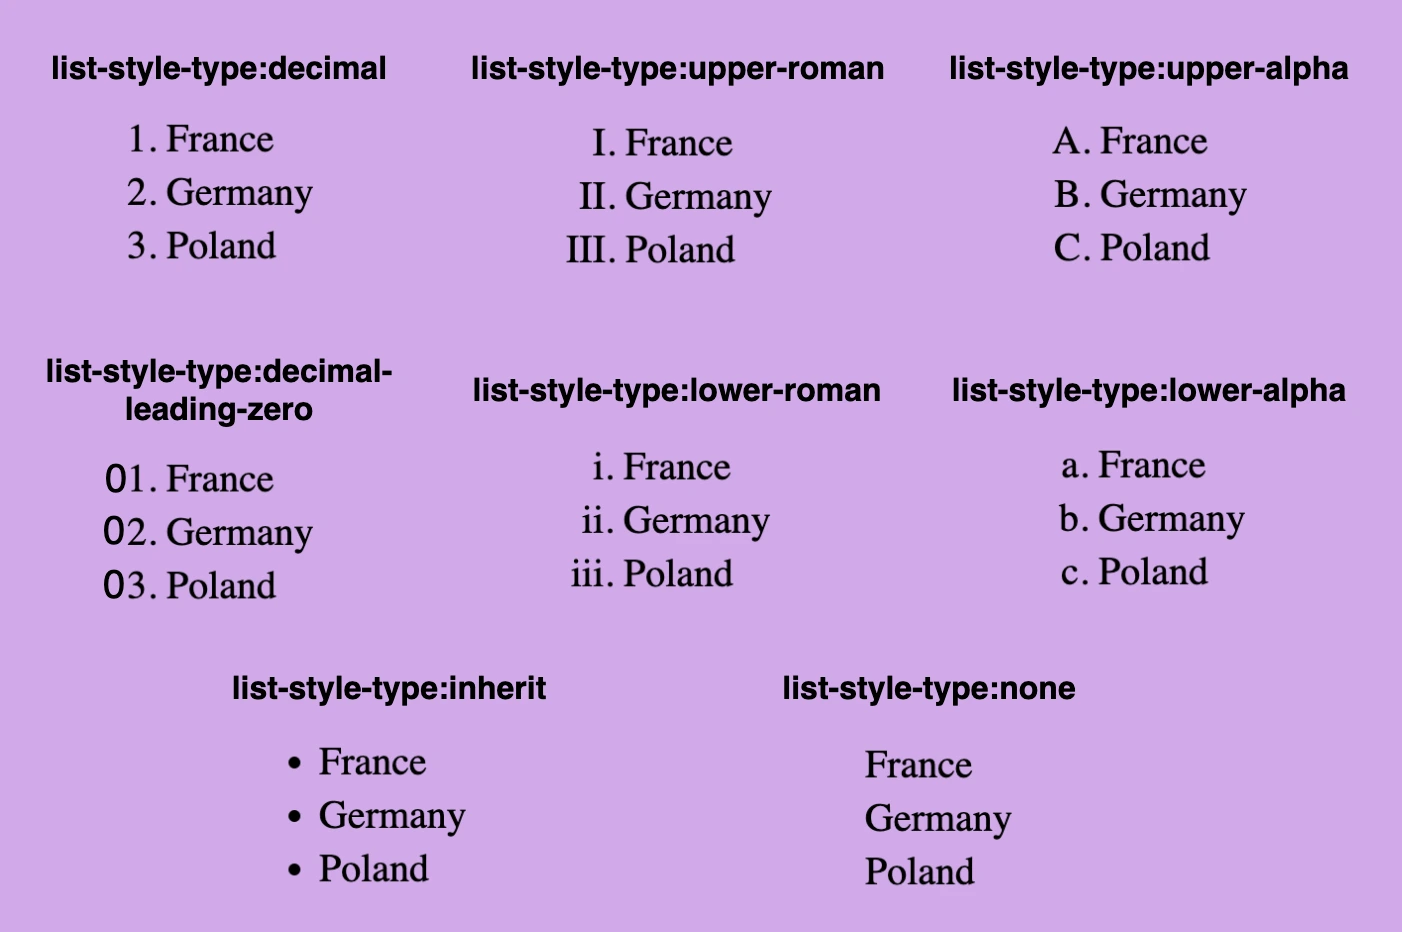
An ordered list, by default, uses numbers as markers for each list item. We have the ability to manipulate the list-style-type property and select the desired style.
<olstyle="list-style-type:decimal;"><!-- decimal is for example, you can choose any list-style-type you prefer --><li>France</li><li>Germany</li><li>Poland</li></ol>
HTML
Below, you can see the types off the ordered list.
Unordered list
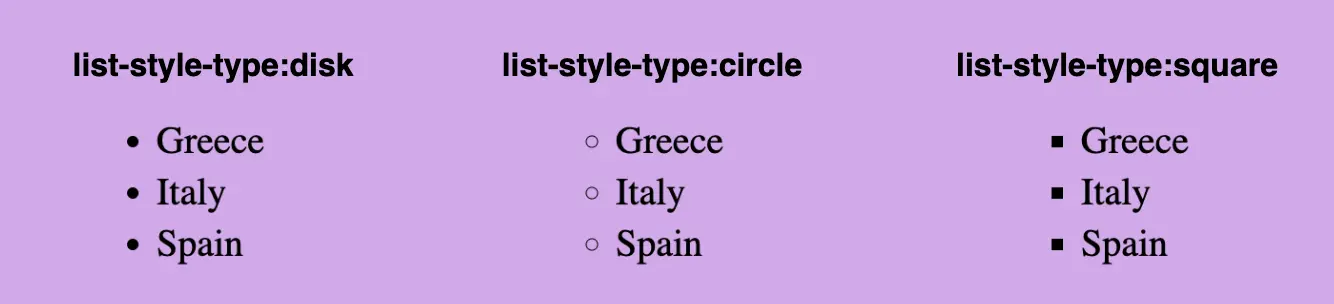
An unordered list, by default, uses a dot like a small black music disk, as its marker (list-style-type: disk;). We can manipulate the list-style-type property and choose the willing style.
<ulstyle="list-style-type:disk;"><!-- disk is for example, you can choose any list-style-type you prefer --><li>Greece</li><li>Italy</li><li>Spain</li></ul>
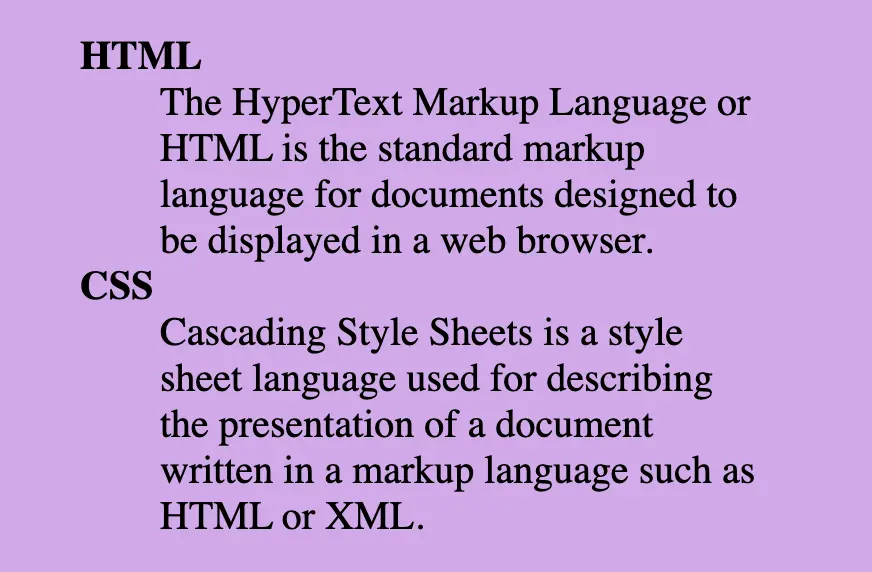
Description lists are used when we want to show terms followed by their descriptions. It consists of <dl> tag (a description list) which requires two elements. The first one is a <dt> tag, the description term element, and the second one is the <dd> tag, the description element. Keep in mind, that the <dd> element has somemargin-left set by default.
📝 We must pay attention to the correct order, as <dt> tag always comes before <dd> tag.
<dl><dt><b>HTML</b></dt><dd>The HyperText Markup Language or HTML is the standard markup language for documents designed to be displayed in a web browser.</dd><dt><b>CSS</b></dt><dd>Cascading Style Sheets is a style sheet language used for describing the presentation of a document written in a markup language such as HTML or XML.</dd></dl>
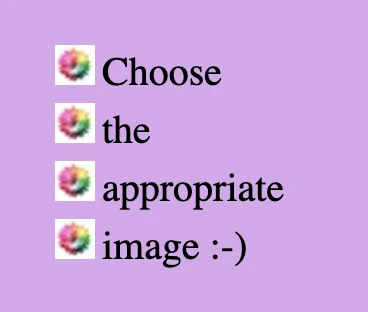
In HTML lists, instead of marks, we can also use an image. Although it is really demanding, if we choose the appropriate image and do all the necessary modifications we can achieve a really amazing result. We have to replace the marks and create a list by adding the image’s URL to the list-style-image property.
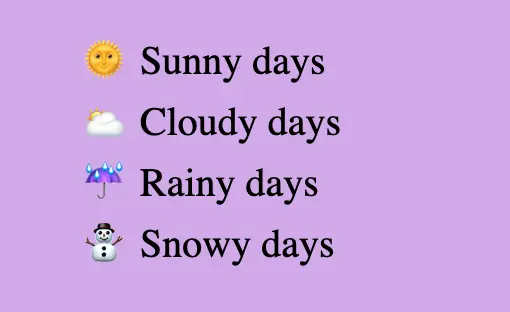
.emoticons-weather {list-style: none;}/* We use :not(:last-child) selector because we want to add distance * between all list items apart from the last one. */li:not(:last-child) {margin-bottom: 4px;}.emoticons-weatherli {&:before {margin-right: 8px; }&:nth-child(1):before {content: "🌞"; }&:nth-child(2):before {content: "🌥"; }&:nth-child(3):before {content: "☔"; }&:nth-child(4):before {content: "⛄"; }} /* end of emoticons-weather li */
SCSS
🤗 I chose these lovely emoticons above for my examples, but you can select any emoticon you want! All you have to do is copy and paste them into the content property.
By default, HTML lists are vertical & list items have display: block;.Because of their blocked display, each list item takes up the available screen width and starts in a new line. In order to use them in a horizontal direction, we must implement them by changing the list-style property to none list-style: none; and setting the display property to inline-block display: inline-block;. This way, they occupy the same space as their size, and we can put them, side by side, on the same line.
💡 It is common to use horizontal lists in order to make navbars.
We often format HTML elements using CSS but can achieve basic text formatting using only HTML. Below are some of the most common HTML formatting elements for text and layout. I also prepared some examples for better understanding.
HTML Elements – Text Formatting
bold
<b>...</b>
<div>I am a <b>bold</b> text</div>
HTML
strong
<strong>...</strong>
<div>I am a <strong>strong</strong> text</div>
HTML
📢 Bold VS Strong
As we can see below <bold> and <strong> look exactly the same. The difference is that we use strong when we have to show an important text and bold when we want just to pay attention to the text, something like highlighting.
<div>I am a <b>simple</b> text BUT i am an <strong>important</strong> text!!</div>
Formatting italic <i> and emphasized <em> appear in the exact same way. We use emphasized when we want to give emphasis to the text and italic when we want to present different our text.
<div>I am an <i>italic</i> text BUT i am an <em>emphasized</em> text!!</div>
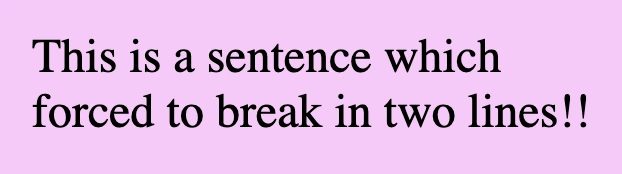
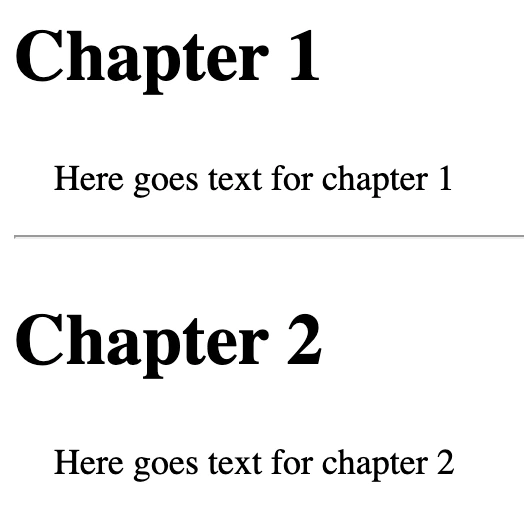
We can use two tags in HTML to manipulate our document’s layout. Break Line tag <br/> which inserts a new line by adding the tag wherever we want to force the text to break and the Horizontal row tag<hr/> which is used if we want to add space between HTML elements. There are both self-closing tags as they are empty elements.
break line
<br>
<div>This is a sentence which <br>forced to break in two lines!!</div>
HTML
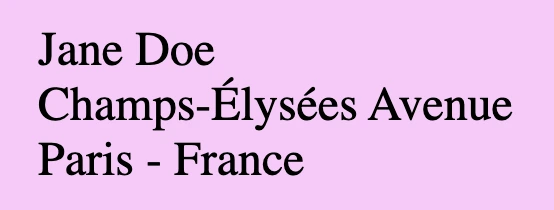
💡 A common practice for adding a new line is using the break line tag, which is helpful If we want to write an address.
<h2>Chapter 1</h2><p>Here goes text for chapter 1</p><hr/><h2>Chapter 2</h2><p>Here goes text for chapter 2</p>
HTML
💡 Remember, If you want to apply extra styling, you have to use 🔓 CSS instead! HTML is used as a markup language, whereas CSS is the one responsible for making something more beautiful 😄).
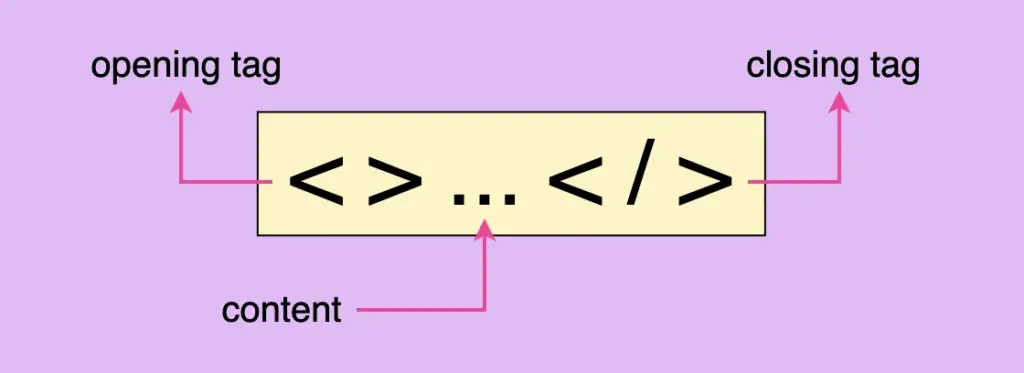
In order to create a web page, it is necessary to use HTML elements. These tags, also known as components represent the fundamental building blocks of a webpage. Each tag consists of:
the opening tag < > declare the beginning of an element and contains its characteristics, which are called attributes.
the closing tag </ > declare the end of an element.
it’s content <>...</> element’s content is accommodated within this space.
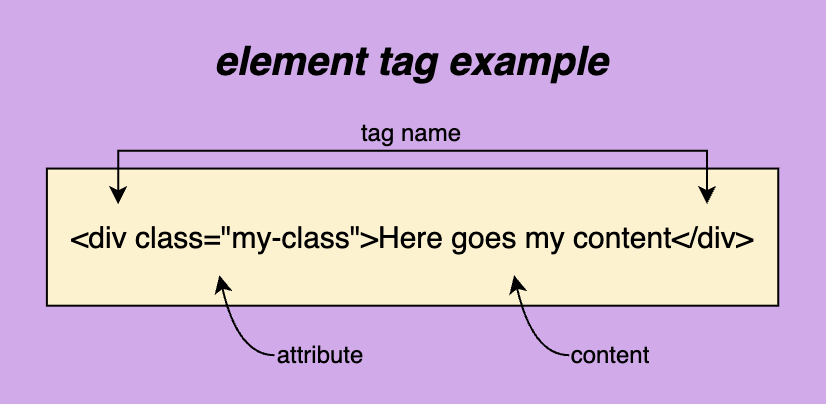
Here are some examples of how to construct HTML elements.
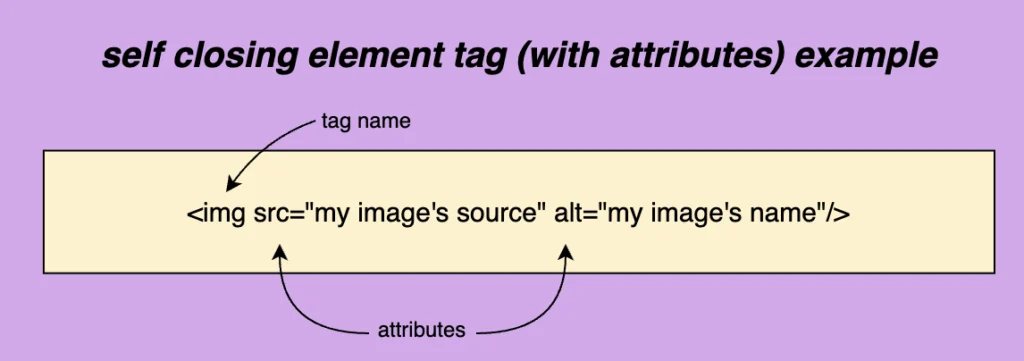
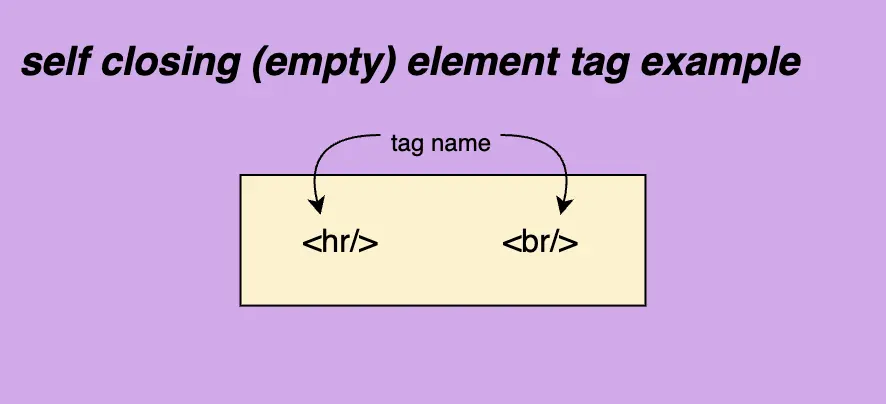
There are also some self-closing tags <.../> which means they have only one tag and no content. Some self-closing tags e.g <img/> have attributes and some don’t, like <hr/> and <br/>.
📝 Regarding closing tags, you may see them closing in the following ways:
<br>
<br/>
<br />
All three types are valid and you are free to use whichever you prefer. In our case, I’ll be using the closure slash without a space.
HTML elements
The <html> tag is required and is the container of all tags. It defines how the browser will present the document. In order to be functional we have to add the <head> tag and the <body> tag with their content.
<!DOCTYPEhtml><head><!-- head elements here --></head><body><!-- body elements here --></body></html>
The head tag has a crucial role in our HTML document. It is the container for adding all required information, in order to upload the document on the browser. Anything included in the head element, though, is not displayed on the browser. Each document can have only a single head element. A list, of head tags and their usage, is shown below:
The base tag is the one we use when specifying the base URL for our document/site. It is the one used when creating relative URLs. For example, if we would like to add as a base URL for our site we would do something like:
<basehref="https://littlecodingthings.com/"/>
HTML
link
<link/>
It’s the tag that specifies a connection between our document and another source. Some of the most commonly used attributes are, the rel , the type and the href attribute.
rel shows the relationship between the two parts, type shows the type of resource linked to the document, and last (but not least) href gives the path to the resource, in simple words it is the resource’s address. type is an optional attribute and therefore can be omitted. The resource we are connecting our document to could be internal (inside our project’s folder) or external e.g another website.
In the example below you can see that I connect my HTML page with a CSS stylesheet (internal file) and a font awesome icons resource (external file).
It provides information about the document’s data, it’s data about data!
For example, if you want to provide information about the author who wrote the page or the keywords which are responsible for the search engine optimization you can use the code below.
Is a special HTML element, you can use to add styles (CSS) to your web page. It helps you to modify the presentation and layout of your web page. In simple words, it allows you to customize characteristics like fonts, sizes, and colors so that your web page looks the way you prefer. Additionally, it is important to know that when you implement elements using <style> they may override other stylings you have probably added to your CSS (depending on your CSS rules specificity).
For example, if you want to apply green font-color to all h1 (headings) and font-size 12px to all paragraphs on your web page you can use a style tag as seen below. This code will apply green color to all h1 tags and a 12px font size to all paragraphs.
The title tag is an HTML element used to define the title of a web page. It is placed within the <head> section of an HTML document and is not visible on the actual page but is displayed on the browser’s title bar or tab
<title>Little Coding Things</title>
HTML
Body elements
<body>...</body>
This required element is the container of all tags we use to create the structure — the appearance — of the document. Only one body element can be in each document. Anything contained in the body tag is displayed on the browser.
<body><h1>Hellow there</h1><p>How are you today? Would you like to fill the form below and be a member?</p><form>...</form><button>Submit</button><div>Little Coding Things Family Welcomes You!</div> ...</body>
HTML
navbar
<nav>...</nav>
This tag defines a section of navigation links, such as all those in a navigation bar. It emphasizes the semantic structure of a web page, making navigation links more accessible and easier to identify for both users and search engines.
The provided code snippet shows how to create a simple navigation bar using the <nav> element. Inside the <nav> tag, an unordered list (<ul>) is used to organize navigation links as list items (<li>). Each list item contains an <a> tag, which represents a hyperlink. This structure is visually organized and semantically meaningful, as the <nav> element displays a block of navigational content, improving accessibility for screen readers and helping search engines understand the site’s structure. This layout is a basis for building user-friendly and responsive navigation menus.
🔖 By default, the list has a vertical orientation as HTML documents naturally have a vertical flow of content. To style the navigation bar into a horizontal layout or add other design elements like spacing, colors, and hover effects, CSS must be applied. 🤔 ✨
anchor
<a>...</a>
We will use this tag If we want to create a hyperlink. It is necessary to include the href="" value where we set the address of the link we want to visit which can be an internal URL href="./..." or an external one href="https://littlecodingthings.com/about-us/".
It is optional but really helpful to include target="_blank" value if we want our link to open in a different tab. Its default value is target="_self" and it opens the link to the current browsing context, the same page.
<ahref="./..."target="_blank">Check our new post</a><ahref="https://littlecodingthings.com/"target="_blank">Little Coding Things</a>
HTML
address
<address>...</address>
This HTML tag provides contact information about a person or an organization.
The article tag is used for specifying content independence, its content should be self-contained and have its own meaning. Examples of such usage could be a newspaper article, a forum or a blog post.
<article><h1>Explore India</h1><img/><!-- An image that shows India --><h2>India's Top Ten Attractions</h2><p>Here goes text about India's attractions</p><h2>India's Food</h2><p>Here goes text about India's cusine</p></article><article><h1>Explore Tanzania</h1><img/><!-- An image that shows Tanzania --><h2>Tanzania's Top Ten Attractions</h2><p>Here goes text about Tanzania's attractions</p><h2>Tanzania's Food</h2><p>Here goes text about Tanzania's cusine</p></article>
HTML
button
<button>...</button>
Defines a button we want to introduce to our document. It is interactive by the user and represents an action. It may contain text, icons, or even images. Including the type="button" attribute is crucial for declaring and rendering it properly within the browser.
Below, you can see a button I create for you to understand it better. It would be nice to add CSS to make it prettier! 😉
The division tag is the most common tag and defines a section in the document. HTML5 introduced some new tags, like section and footer, to provide a more descriptive way of splitting a document’s contents. Before that, the div tag was the primary choice, and often resulted in a situation referred to as “div hell”.
<div> Lorem ipsum dolor sit amet consectetur adipisicing elit. Maxime mollitia, molestiae quas vel sint commodi repudiandae consequuntur voluptatum laborum numquam blanditiis harum quisquam eius sed odit fugiat iusto fuga praesentium optio, eaque rerum! Provident similique accusantium nemo autem.</div>
HTML
footer
<footer>...</footer>
It represents the content that appears at the bottom of a webpage and usually includes additional information such as contact details, navigation links, sitemaps, and copyright information.
<footer>...</footer>
HTML
image
<img/>
This tag helps us to insert an image into our document. It is necessary to include the src attribute that sets the path of the image we want to display on the browser. Additionally, the alt attribute plays a crucial role by providing information about the image. The information is utilized by screen readers, benefiting individuals with reading disabilities. It is also recommended by SEO guidelines and appears when the image fails to load correctly (e.g. broken image link cases). Further attributes that can be added include width and height allowing us to define the dimensions of our image. By using images we can beautify our content and make it more attractive and explanatory.
We have six heading tags. From <h1> which is the biggest to <h6> which is the smallest based on their font-size. All headings have a default size, which can be modified using CSS. Headings are extremely important as they give emphasis and they provide brief information about our document.
<h1>...</h1><!-- largest heading --><h2>...</h2><h3>...</h3><h4>...</h4><h5>...</h5><h6>...</h6><!-- smallest heading -->
HTML
list
<li>...</li>
We have ordered <ol> list that can be either numerical or alphabetical and the unordered <ul> list that utilizes bullet points.
Additionally, there is a description <dl> list that is used when we want to display terms along with their corresponding descriptions. It consists of the <dl> tag (a description list) which requires two elements. The first one is a <dt> tag, the description term element, and the second one is the <dd> tag, representing the description itself. Keep in mind, that the <dd> element has somemargin-left set by default.
📝 Pay attention to the correct order, as <dt> tag always comes before <dd> tag.
<li><ol>First item</ol><ol>Second item</ol></li><li><ul>First item</ul><ul>Second item</ul></li><dl><dt>HTML</dt><dd> The HyperText Markup Language or HTML is the standard markup language for documents designed to be displayed in a web browser.</dd><dt>CSS</dt><dd> Cascading Style Sheets is a style sheet language used for describing the presentation of a document written in a markup language such as HTML or XML.</dd></dl>
It specifies the most significant content that is unique in the whole document and should not be repeated across multiple pages. It must also not contain repeated content such as headers, logos, forms, or links and it can’t be the child of other sections like headers, navbars, footers, or sidebar elements.
<main><h1>I am the main content</h1><p>I am the first paragraph of the text</p><p>I am the second paragraph of the text</p></main>
HTML
paragraph
<p>...</p>
We set it when we add a new paragraph to the document. It is commonly used to separate blocks of text into individual paragraphs, making it easier to organize, read, and understand.
<p> I am the first paragraph for your content.</p><p> I am the second paragraph for your content.</p>
HTML
section
<section>...</section>
This tag is used for separating an HTML document into distinct categories.
<h1>Making cake</h1><section><h2>Ingredients</h2><p>In order to make a cake we will need butter, flour, milk, cocoa and lemmons.</p></section><section><h2>Baking</h2><p>We bake the cake in a preheated oven for 50 min at 160 degrees.</p></section>
HTML
span
<span>...</span>
Is an inline container. We use span when we want to manipulate a specific part inside another HTML element.
<p> My garden has beautiful<spanstyle="color:green">green</span> trees and<spanstyle="color:yellow">yellow</span> flowers.</p>
When we want to insert a table into our document we can use the <table> tag. To add any essential components of a table we can use <tr> for rows,<th> for headings and <td> for cells.
The HTML comment tag is really helpful as we use it to keep notes, which are not displayed on the browser when loaded. However, you have to be careful not to add any sensitive data inside a comment because even though it is not rendered in the browser’s view, it will show up to anyone who knows how to use the browser developer tools and check the HTML document elements.
<!-- Here goes my comment --><!-- Here goes my comment when it is more than one line-->
HTML
script
<script>...</script>
The script tag is commonly known as a special container. It is basically a playground where we can include a set of instructions — a script — that the browser can understand and follow. We can add the instructions inside the tag or link them to an external file that contains our code. In both cases, when the browser reads the HTML document and reaches the script tag, it will try to read and execute what’s included.
<script>console.log('Hey! Welcome to Little Coding Things squad!');</script><scriptsrc="our-script-file.js"></script><scriptsrc="https://littlecodingthings.com/non-existent-script-file.js"></script>